Neon Serverless PostgreSQL Connection Guide
This guide covers how to configure and connect to Neon serverless PostgreSQL databases in DBConvert Streams.
1. Prerequisites
- Neon account (sign up)
- Project created in Neon Console
- Database connection credentials
- Access to database configuration
2. Project Setup
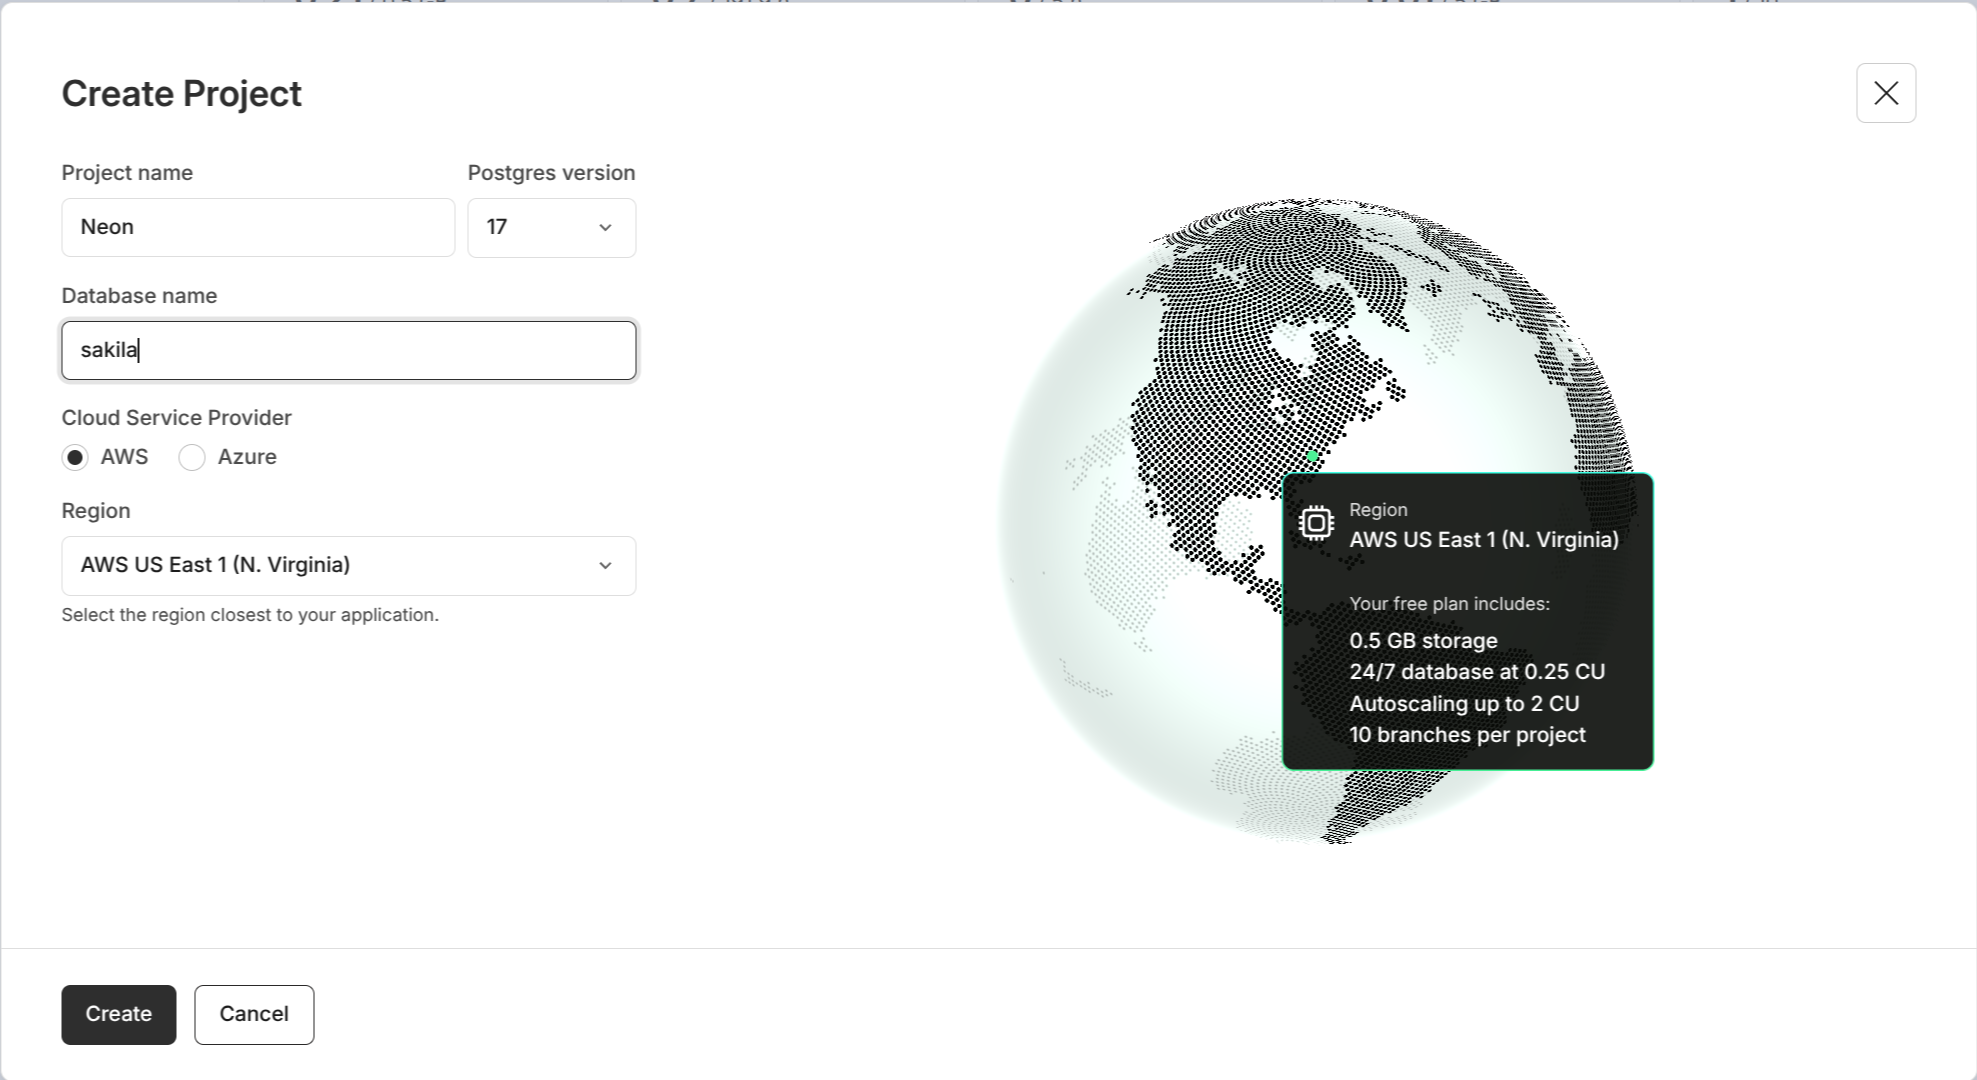
2.1 Create a Project
- Log into Neon Console
- Click "New Project"
- Enter project details:
- Project name
- Database name
- Postgres version
- Cloud Service Provider (AWS or Azure)
- Region (select the region closest to your application)
2.2 Database Configuration
Neon provides serverless PostgreSQL with:
- Automatic compute scaling
- Built-in branching capability
- Separated storage and compute
- SSL-enabled connections
INFO
Neon uses a branching model for databases. The main branch is created automatically with your project.
3. User Management
3.1 Create Database User
In Neon Console:
- Navigate to your project
- Go to "Settings" → "Users"
- Click "New User"
Configure basic user permissions:
-- Create regular user
CREATE USER app_user WITH PASSWORD 'strong_password';

-- Grant basic privileges
GRANT CONNECT ON DATABASE your_database TO app_user;
GRANT USAGE ON SCHEMA public TO app_user;
GRANT SELECT, INSERT, UPDATE, DELETE ON ALL TABLES IN SCHEMA public TO app_user;
ALTER DEFAULT PRIVILEGES IN SCHEMA public
    GRANT SELECT, INSERT, UPDATE, DELETE ON TABLES TO app_user;
3.2 Verify User Privileges
-- Check user privileges
\du app_user

-- Check table permissions
\dp
4. Connection Configuration
4.1 Get Connection String
- From the Project Dashboard:
- Click "Connect" button
- Select your branch (default: main)
- Under "Connection Details", copy the connection string
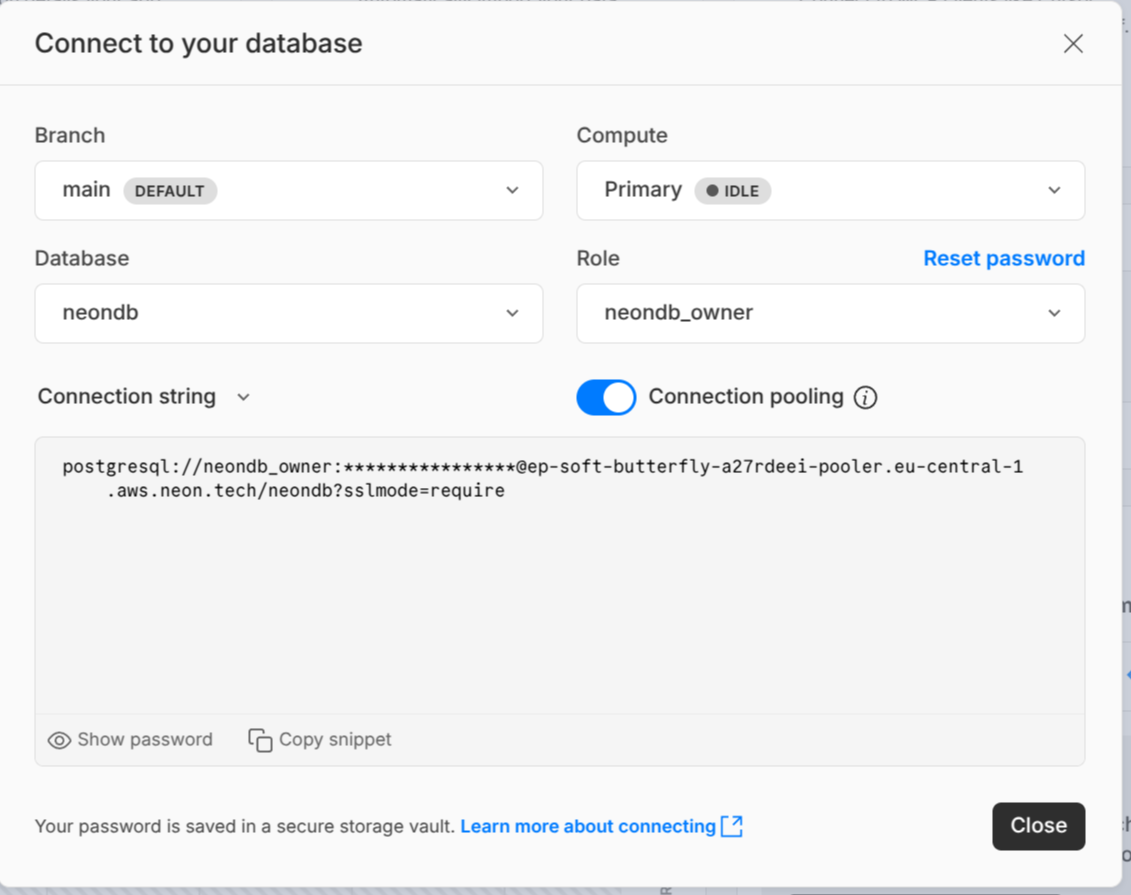
Connection string format:
postgres://user:[email protected]/dbname?sslmode=require4.2 Configure in DBConvert Streams
- Select PostgreSQL as database type
- Enter connection details:
- Server: endpoint.region.aws.neon.tech
- Port: 5432
- User ID: Your database username
- Password: Your database password
- Database: Your database name
- Schema: Your schema name (default: public)
Important
Neon requires SSL connections. Make sure SSL mode is enabled in your connection configuration.
5. CDC Configuration
5.1 Enable Logical Replication
Important
When using Neon as a source database for CDC, logical replication must be manually enabled.
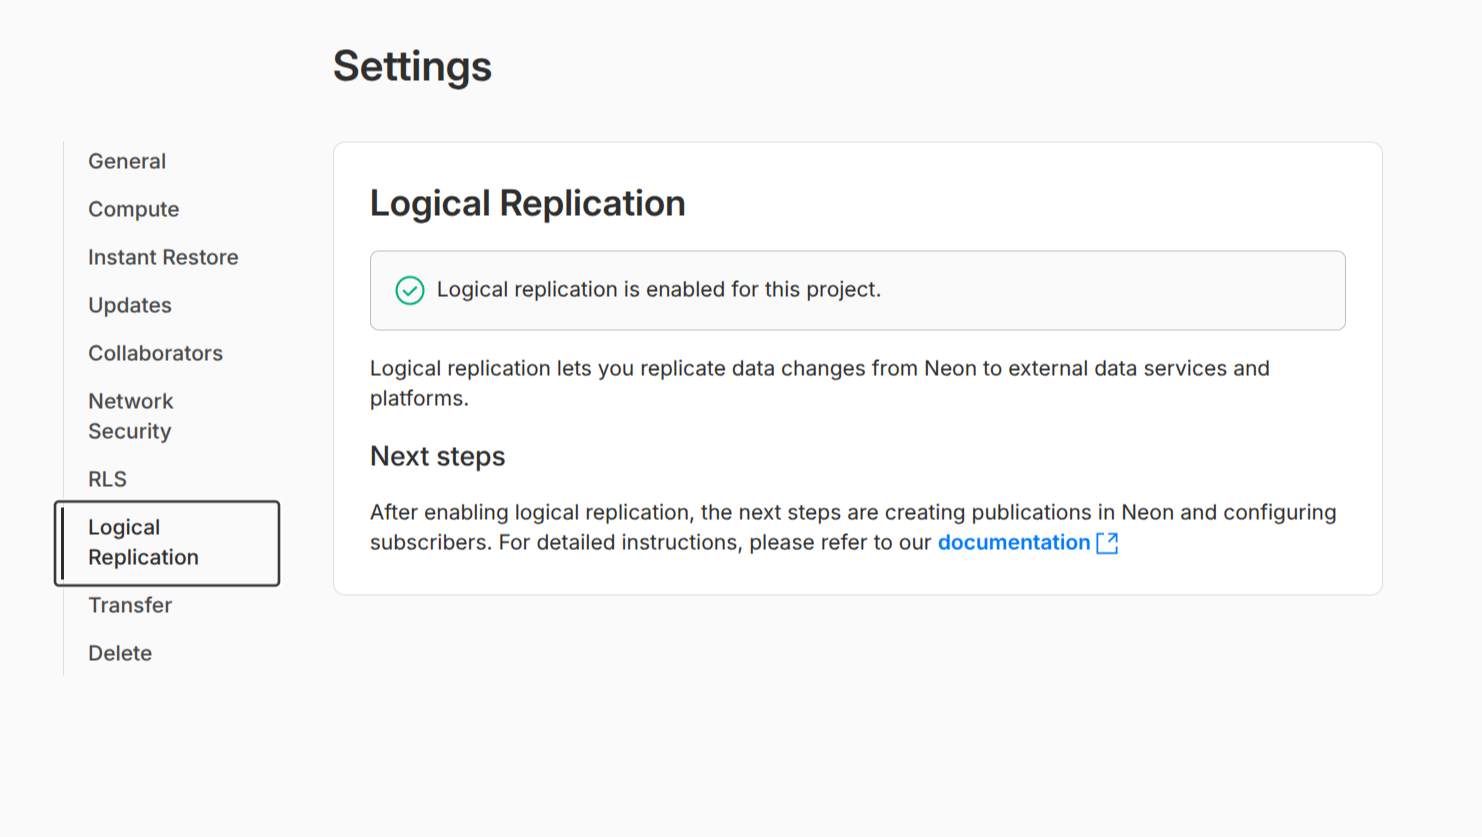
- In Neon Console:
- Navigate to your project
- Go to "Project settings" → "Logical Replication"
- Enable logical replication
INFO
Enabling logical replication will:
- Change the
wal_leveltological - Allow CDC operations to capture changes
5.2 Configure CDC User
For CDC operations, create a dedicated replication user:
-- Create replication user
CREATE USER cdc_user WITH REPLICATION PASSWORD 'strong_password';

-- Grant necessary privileges
GRANT CONNECT ON DATABASE your_database TO cdc_user;
GRANT USAGE ON SCHEMA public TO cdc_user;
GRANT SELECT ON ALL TABLES IN SCHEMA public TO cdc_user;
ALTER DEFAULT PRIVILEGES IN SCHEMA public
    GRANT SELECT ON TABLES TO cdc_user;
Verify CDC user privileges:
-- Check replication privilege
\du cdc_user

-- Verify schema access
\dn+

-- Check table permissions
\dp
5.3 Verify Replication Settings
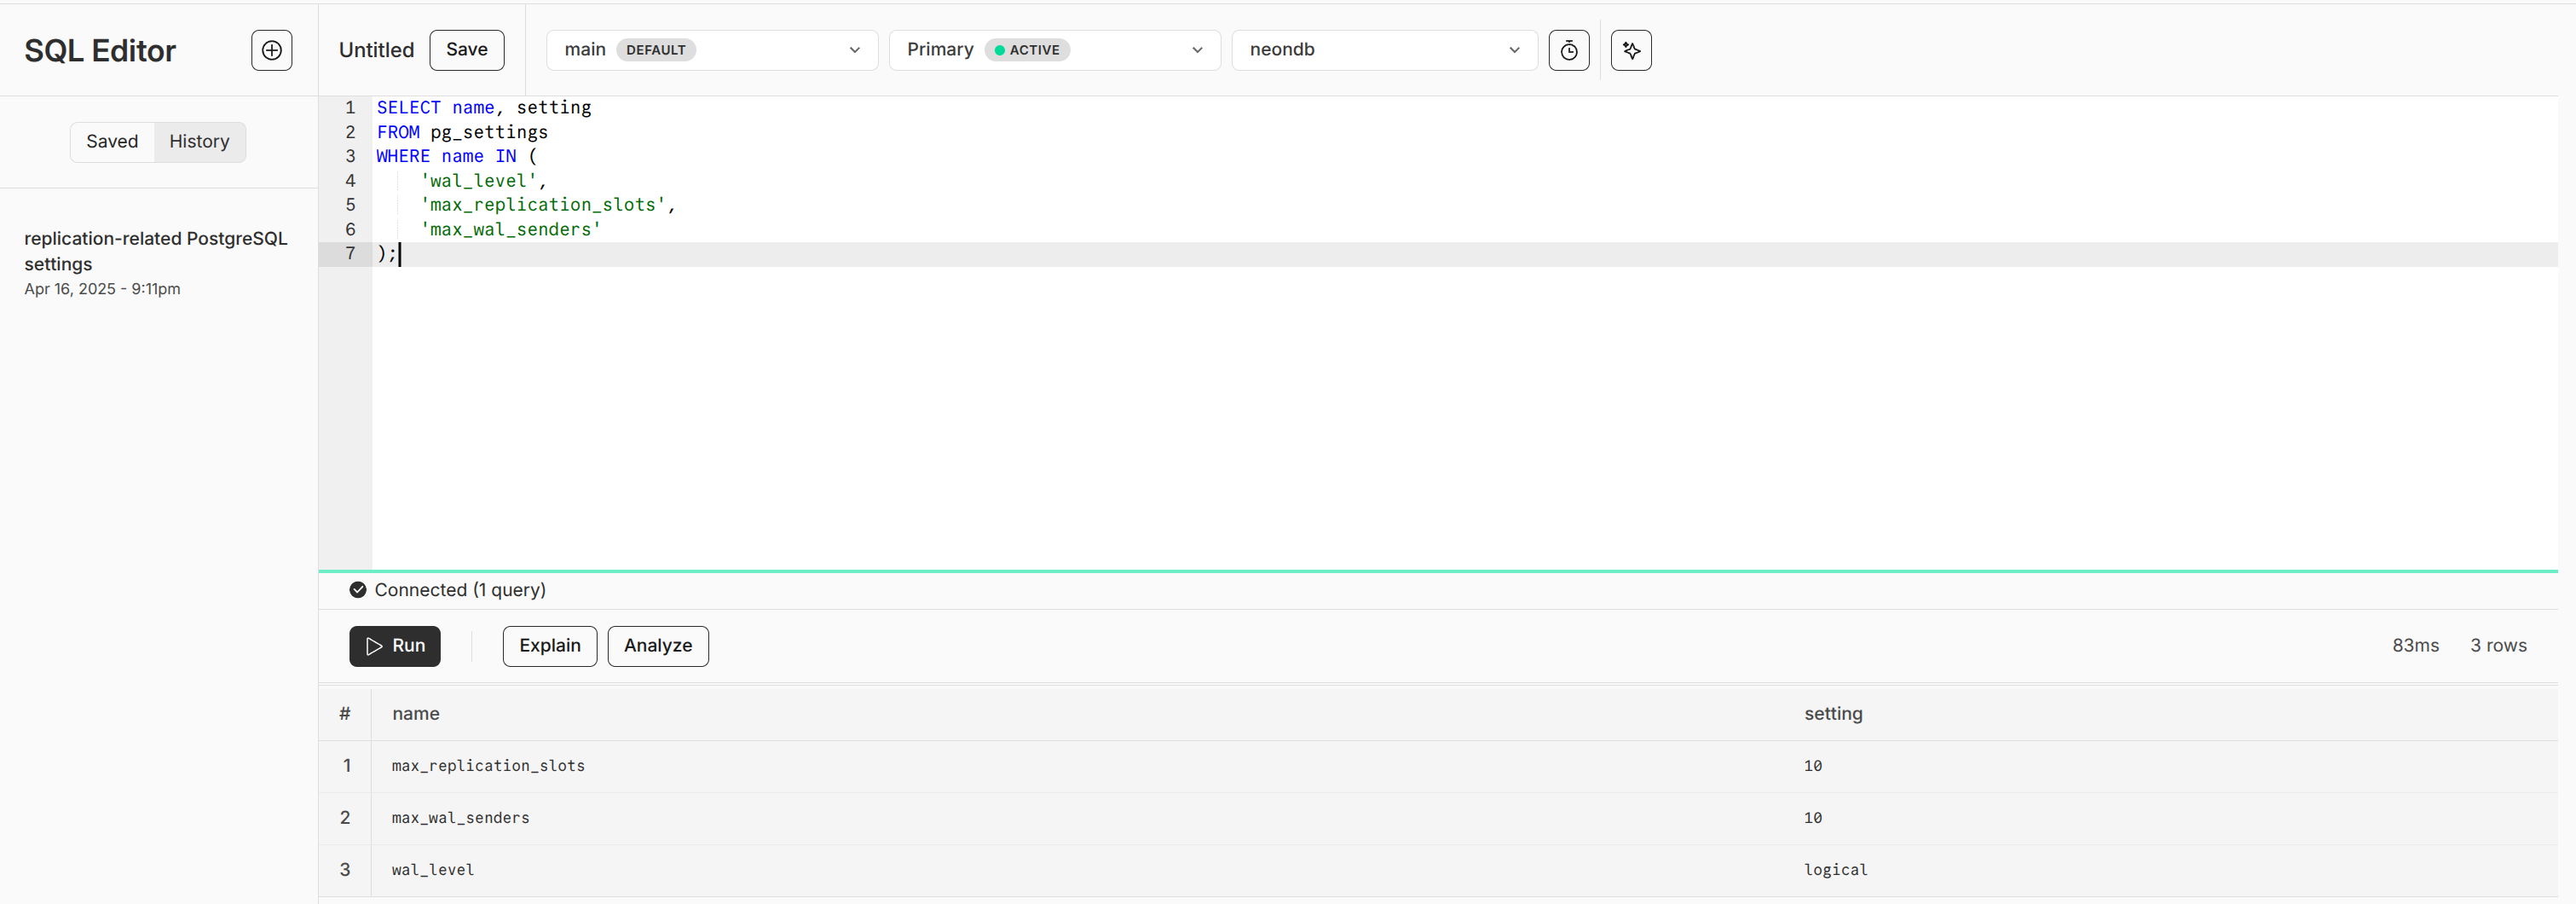
After enabling logical replication, verify Neon's configuration:
-- Check replication settings
SELECT name, setting
FROM pg_settings
WHERE name IN (
    'wal_level',
    'max_replication_slots',
    'max_wal_senders'
);
6. Performance Considerations
6.1 Autoscaling
For CDC workloads, consider these factors when setting compute size:
Minimum compute (0.25 - 1 CU):
- Light workload: 0.25 CU (suitable for development)
- Medium workload: 0.5 CU (recommended for production)
- Heavy workload: 1 CU (high-frequency changes)
Maximum compute (1 - 7 CU):
- Set based on peak load requirements
- Consider frequency of data changes
- Account for concurrent connections
TIP
Monitor your compute metrics in Neon Console to optimize these settings:
- CPU utilization
- Active connections
- Memory usage
- I/O operations
6.2 Compute Settings
- In Neon Console:
- Go to "Settings" → "Compute"
- Configure:
- Minimum compute units
- Maximum compute units
- Autoscaling settings
6.3 Connection Management
For optimal performance:
- Use connection pooling for high-concurrency workloads
- Consider compute autoscaling settings for your workload pattern
- Monitor active connections to stay within limits